教程:检查检查器在Final Cut Pro X, Pt. 1
本教程在Apple Final Cut Pro X检查视频检查器, a context-sensitive area of the 冷冻铸造X interface that allows you to change settings of various filters and settings, 并专注于进行基本但有效的色彩调整.
在本教程中 on Apple Final Cut Pro X we’re going to be inspecting the Inspector, a context-sensitive area of Final Cut Pro X that allows you to change settings of various filters and settings.
告诉冷冻铸造X显示检查器, 单击时间轴上方面板中右数第二个图标. It looks like a bunch of sliders with knobs on it, and it toggles on and off when you click it (下面的图1). You can also show or hide the Inspector by using the keyboard shortcut Command+4.

图1. 单击此图标可打开或关闭检查器. (Click on this image--or any screenshot in this article--to see a full-size version in a new window.)
在颜色区工作
视察督察(下面的图2),我们将从上面开始,然后往下走. 在本教程中,我们将重点关注颜色区域. 这是你使用最多的检查器区域.

图2. Final Cut Pro X检查器的效果和颜色部分.
Right above the Color area you see there is one other section: the Effects section. 当你从效果调色板中添加效果时,它将填充效果. So if you grab an Effect and drag it onto a clip, it will populate this Effects area. But as I mentioned before, we’ll concern ourselves primarily with the Color area in this tutorial.
在我们开始之前, it’s important to understand timeline cursor behavior in selections and how they work. 如果我的时间轴上没有选择, whatever clip the timeline cursor is over will actually be automatically be loaded into the Inspector. 比如说我想做一个颜色调整. 我点击更正1的箭头,如图所示 图3(下面). In the Color Adjustment panel for Correction 1, I go to Saturation, and drag the saturation down. 你可以看到 图4(在图3下面),它变成了黑白.

图3. 打开颜色调整面板.
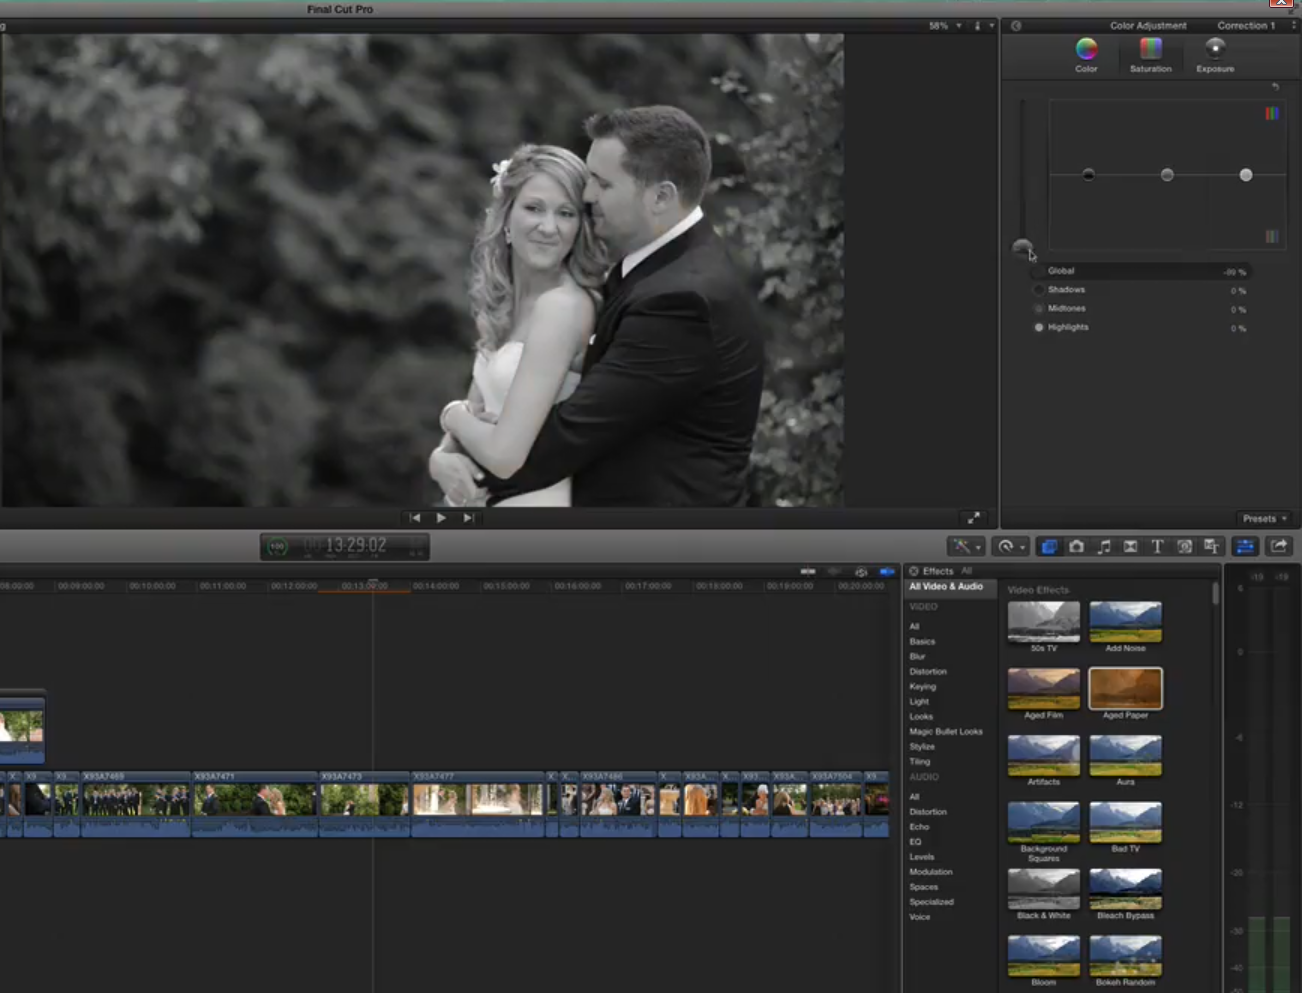
图4. Making a color adjustment to the clip at the timeline cursor (with no other clip selected) by dragging the Saturation slider in the Color section of the Inspector.
但如果我在剪辑被选中之前对它做同样的操作, the clip at the timeline cursor (and shown in the preview window) will not be affected. 我们所做的调整将应用于所选剪辑, 哪个恰好是当前预览窗口中剪辑旁边的那个. The moral of the story is, make sure whatever clip you’re working on is selected.
One way to make sure you’re adjusting the same clip you’re seeing is to hit the C key on your keyboard as it’s playing and it’ll automatically select whatever clip is below the timeline cursor.
Now let’s say you want to do some work on a specific clip that doesn’t happen to be under the timeline cursor. 单击它并突出显示它以将其加载到检查器中. If you go into the Inspector and start making changes, you’ll notice nothing’s changing. 原因是时间轴光标在其他地方, 我们在时间轴光标下观看剪辑, 不是被选中进行调整的那个. 当你在颜色调整面板中拖动滑块时, 您正在对所选剪辑进行更改, but you’re not seeing them previewed because the timeline cursor is on a different clip in the timeline.
One way to quickly highlight a clip and have the timeline cursor move at the same time is hold down the Option key and click it, 和Final Cut Pro X将您的时间轴光标移动到那里. 这样它就被选中了, 它在排队, 它会将剪辑加载到检查器中, plus your timeline cursor is lined up so you’re actually viewing the changes in real time as well, 而不是查看时间线的另一部分.
相关文章
Here's a look at two workflows for applying film grain to your footage in 冷冻铸造X using cineLook (with and without Gorilla Grain), 首先是用Blackmagic生产相机拍摄的4k镜头, 然后用cinestyle数码单反拍平镜头.
在我们关于最近发布的FCP 10的第一个教程中.1, 我们来看看新的库特性, which enhances project and media organization and eases the adjustment for editors transitioning from FCP 7.
This tutorial on Apple Final Cut Pro X takes a closer look at color correction in the Inspector, 探索平衡色彩, 颜色匹配, 和颜色蒙版和形状蒙版功能.
In this video tutorial 格伦·艾略特 of Cord3Films looks at 冷冻铸造X's Timeline Index which provides innovative options for viewing, 导航, 搜索你的项目, including three different types of timeline markers and the ability to create a navigable To Do list of editing notes that's indispensable for collaborative workflows.
在本教程中, Cord3Films' 格伦·艾略特 demonstrates how to mix audio from multiple off-camera sources in a multicam edit in Apple Final Cut Pro X.
在我们在Final Cut Pro X多镜头编辑系列的第2部分, 格伦·艾略特 explains how you can accelerate and streamline the multicam-syncing process in Red Giant's PluralEyes 3.
Our Final Cut Pro X tutorial series continues with the first installment of a 3-part series on multicam editing in 冷冻铸造X, addressing the basics like creating a multicam clip and cutting and switching audio and video using the Angle Editor.
Working with compound clips in 冷冻铸造X is similar to nesting sequences in Final Cut Pro 7. 一旦你明白它是如何工作的, 以及复合剪辑的更改如何影响整个项目, 这是一个强大的功能,您会发现自己使用得越来越多.
在本教程中, we'll look at several ways you can use connected storylines to enhance your 冷冻铸造X edits and mix in cutaways and creative shots in a quick and efficient way.
This tutorial explores advanced editing techniques in 冷冻铸造X including back-timing your edits, 替换编辑和试镜, 全体编辑, 扩展编辑, trim-to-selection编辑, 键盘修剪, 和精密编辑器.
The mag网ic timeline is one of the major revolutionary changes in Apple Final Cut Pro X, and one of the areas editors struggle with when they're coming from track-based NLEs. 在本教程中 we'll break it down and show you how to make it work for you.
在我们新教程系列的第一部分中, 格伦·埃利奥特揭秘Final Cut Pro X, 说明其核心功能, 并专注于最强大的组织新功能之一, 加速, 精简你的编辑:元数据关键字标签.